Specter's Rendering Pipeline
1. Particle Rendering
All particles are rendered in additive blending mode. This allows for nice fire effects, which is the main application of particle systems in Specter. Effects like smoke or dust are hard to achieve this way, but until now we haven’t had need for them. Due to the fact that I only want to apply the additive blending to the particles themselves and not to the scene I have to render them to a separate render target. I also render the depth of each pixel to a separate render target, which will later be used for a z-combine with the world render target.

Particle render target
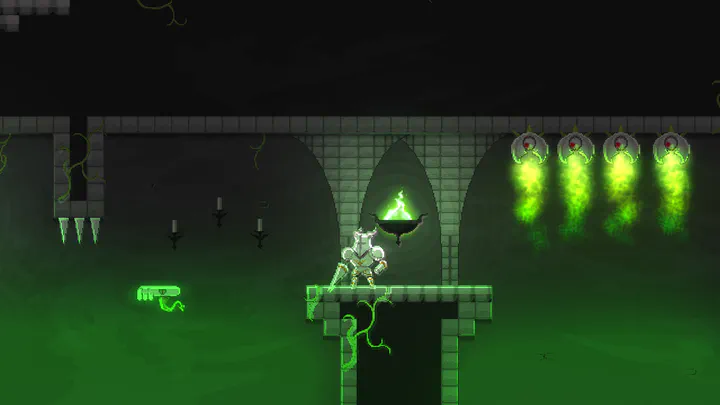
2. World Rendering
The rest of the world is rendered in alpha blend mode, back-to-front, to a separate render target. That means all sprites have to be depth sorted first. This can get really expensive (at one point 25% of the time in each frame was spent on depth sorting). How I optimized that will be the theme of a later post. I again render the depth of each pixel to a depth buffer. The world depth buffer will be used for the z-combine with the particles, but also as input for the lighting shader.

World render target

World depth target (lighter is farther away)
3. Light Rendering
Before we combine the particle and the world render targets we first have to light the scene. Otherwise the particles would be dimmed as well and looking at how they are used for fire that would ruin the effect. The lighting system is one of the more complex systems in Specter and will get a separate post as well. It’s based on a blog post by soolstyle, but heavily modified, optimized and in some aspects simplified. I render a quad for every light which is on screen, using the world depth buffer as input for a shader. In the shader I run a edge detection algorithm on the depth buffer to find ridges. The lights are rendered in additive mode. The lighting system supports point and spot lights at the moment.

Light buffer
4. World/Light combine
To combine the lighting with the world I use a pixel shader that multiplies the two textures together and adds the ambient lighting. It get’s tuned a little bit depending on how bright the scene is, but that’s not too dramatic.
5. Particle/World combine
As mentioned earlier I combine the world and the particle render target using their depth buffers. This allows me to render particles behind parts of the world. Basically, I render the particle render target over the world render target. A shader takes the two depth buffers as input and discards any pixel where the particle depth is larger than the world depth.
6. Bloom filter
The next step is a full screen bloom effect, which helps to blow out some highlights.
7. Distortion
I’ll write another post about distortion but until then you can have a look at this blog post by Eric Wheeler. I do almost exactly what he does.
That’s it for now. As I said I’ll go more in depth about some aspects in future posts, so stay tuned!